Imagine a table that looks like a piece of art, with the raw, natural beauty of wood meeting the smooth, glassy finish of epoxy. That’s the magic of a live edge table! But when it comes to choosing the perfect epoxy for your project, it can feel like navigating a maze. You want that stunning, durable finish, but the sheer number of choices can be overwhelming. What kind of epoxy is best for filling those natural gaps and cracks? How do you get that crystal-clear look without bubbles? These are the questions that keep many DIYers up at night.
Don’t worry, we’ve got your back! This blog post is your friendly guide to understanding epoxy for live edge tables. We’ll break down the basics, explain what to look for, and help you avoid common mistakes. By the time you finish reading, you’ll feel confident picking the right epoxy to bring your beautiful live edge table to life. Get ready to transform your wood into a masterpiece!
Our Top 5 Epoxy For Live Edge Table Recommendations at a Glance
Top 5 Epoxy For Live Edge Table Detailed Reviews
1. Epoxy Resin Kit

Rating: 9.0/10
Unleash your creativity with the JDiction Crystal Clear Deep Pour Epoxy Resin Kit. This ¾ gallon kit is designed for impressive resin art projects, from stunning river tables to intricate wood filler and captivating flower crafts. Its 2:1 mix ratio makes it user-friendly for both beginners and experienced artists.
What We Like:
- Deep Pour Capability: You can pour up to 4 inches thick in a single layer. This means no more worrying about cracks when creating large, impressive pieces like river tables or chunky resin art.
- Generous Working Time: With 90-120 minutes of working time, you can take your time. There’s no need to rush, giving you ample opportunity to perfect your design and placement.
- Exceptional Hardness: Once cured, this resin reaches over 90D hardness. This makes your creations incredibly tough and resistant to damage, ensuring they last.
- Bubble-Free Finish: The low viscosity of this resin helps it self-level and release air bubbles easily. This results in a super smooth, high-gloss finish every time.
- UV Resistance: Built-in UV inhibitors protect your artwork from yellowing and fading over time. Your beautiful creations will stay vibrant for longer.
- Versatile Compatibility: This resin works wonderfully with pigments, mica powders, wood, and molds. It’s a perfect base for bringing all your artistic ideas to life.
- Dedicated Customer Support: The JDiction team is ready to help with fast responses and multiple ways to reach them. They aim for your complete satisfaction.
What Could Be Improved:
- While the kit is ¾ gallon, for very large projects, you might need to purchase multiple kits, which could increase the overall cost.
This JDiction Epoxy Resin Kit offers fantastic features for deep pouring and achieving professional-looking results. It’s a solid choice for anyone looking to create durable and beautiful resin art.
2. Epoxy Resin Crystal Clear Art 2 Gallon Kit for Coating

Rating: 9.2/10
Unleash your creativity with the PUDUO Epoxy Resin Crystal Clear Art 2 Gallon Kit! This comprehensive kit is designed for artists, crafters, and DIY enthusiasts looking to bring their projects to life with a stunning, glass-like finish. Whether you’re crafting intricate jewelry, designing a new tabletop, or adding a protective coating to wood, this fast-curing, crystal-clear epoxy resin delivers professional results with ease.
What We Like:
- Perfect for all your art projects, from casting and doming to jewelry making.
- Achieve a crystal-clear, high-gloss finish that is scratch-resistant and long-lasting.
- Fast curing means you can remove castings in as little as 8 hours and it’s fully cured in a day.
- Easy to use: simply mix one part resin with one part hardener for a 45-minute work time.
- UV resistant formula helps keep your artwork’s colors vibrant and stable over time.
- Low odor makes your crafting experience more pleasant.
What Could Be Improved:
- While versatile, it’s primarily designed as a casting resin, so performance for other specific applications might vary slightly.
- The 45-minute work time, while generous, might be a bit short for very complex, large-scale projects requiring extensive manipulation.
This PUDUO Epoxy Resin kit empowers you to create beautiful, durable art pieces. Get ready to transform your ideas into stunning realities with this user-friendly and high-performing epoxy resin.
3. Shabebe Table Top Epoxy Resin 2 Gallon
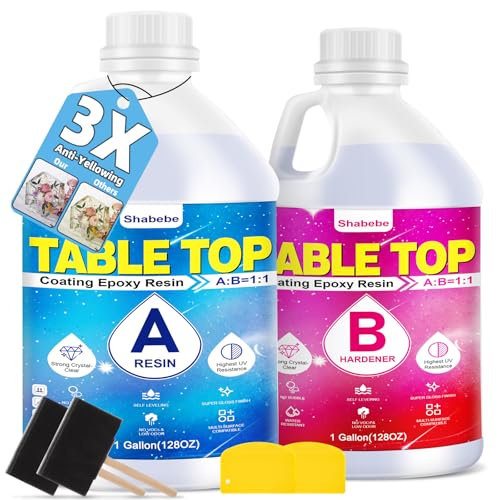
Rating: 9.2/10
The Shabebe Table Top Epoxy Resin 2 Gallon kit promises a professional, high-gloss finish for all your creative projects. This kit is designed for ease of use, even for beginners, and offers a durable, crystal-clear coating perfect for tabletops, bar tops, and more. Its non-toxic and food-safe formula means you can craft with confidence.
What We Like:
- It’s made with an industrial-grade formula that doesn’t create bubbles and mixes well with colors.
- It gives a super clear, shiny finish without needing extra polishing.
- The resin is strong and resists water, UV rays, and scratches, making your projects last.
- It’s safe to use because it’s food-safe, odorless, and has no VOCs.
- The easy 1:1 mixing ratio and self-leveling feature make it simple for anyone to get a professional look.
- It works on many surfaces like wood, metal, and even river tables.
What Could Be Improved:
- You can only pour a thin layer at a time (1/8″ to 1/4″).
- Cold weather can make it hard to cure properly, so you need to control the temperature.
This Shabebe Epoxy Resin kit is a fantastic option for anyone wanting to create beautiful, durable, and safe resin art. Its user-friendly design and high-quality finish make it a top choice for DIY enthusiasts and professionals alike.
4. Building Wood and Resin River-Style Tables: A Step-by-Step Guide with Tips

Rating: 8.8/10
Ready to create a stunning river table that will be the centerpiece of any room? This book, “Building Wood and Resin River-Style Tables: A Step-by-Step Guide with Tips, Techniques, and Inspirational Designs” from Fox Chapel Publishing, is your ultimate guide. It’s designed for beginners, making it easy to build your very own live-edge river table. You’ll learn all the tricks and tips to bring your vision to life.
What We Like:
- Clear, step-by-step instructions make the process easy to follow.
- Lots of inspiring design ideas to spark your creativity.
- Focuses on making it beginner-friendly, so anyone can try.
- Covers essential tips and techniques for successful building.
- Teaches you how to work with both wood and resin.
What Could Be Improved:
- Could include more advanced techniques for those wanting to go further.
- More detailed troubleshooting tips for common resin issues might be helpful.
- A wider range of project sizes and styles could be featured.
This guide empowers you to build beautiful, custom river tables. You’ll gain the skills and confidence to tackle your own projects.
5. Epoxy Resin Art Resin Crystal Clear Formula- The Artist’s Resin for Coating

Rating: 8.6/10
Unleash your inner artist with the Naked Fusion Crystal Clear Epoxy Resin. This gallon kit is designed specifically for creators, offering a non-toxic, odor-free experience so you can focus on your masterpiece. Its crystal-clear formula ensures your colors pop and your projects shine with a glass-like finish.
What We Like:
- Zero VOCs and odor-free for a safer working environment.
- Excellent 4X UV resistance prevents yellowing, keeping your art vibrant.
- Improved heat resistance up to 204°F protects your creations.
- Advanced bubble release technology makes for a smooth, clear finish.
- Food-safe for kitchen projects like countertops and cutting boards.
- Self-leveling formula cures rock solid with a high-gloss mirror shine.
- Superior scratch resistance adds durability to your artwork.
- Generous 45-minute working time allows for detailed creative control.
- Easy 1:1 mixing ratio simplifies the process.
- Enhances vivid and luminescent colors when used with mica pigments and alcohol inks.
- Comes with bonus items: silicone cups, gloves, and spreaders.
What Could Be Improved:
- The “improved packaging” could still be more robust for shipping.
This resin kit is a fantastic choice for artists looking for quality and ease of use. It’s ready to help you create stunning, durable art pieces.
Choosing the Best Epoxy for Your Live Edge Table
A live edge table is a beautiful piece of furniture. It shows off the natural shape of the wood. Epoxy is often used to fill gaps and create a smooth, shiny surface. Picking the right epoxy makes a big difference. This guide helps you find the best epoxy for your live edge table project.
Key Features to Look For
When you shop for epoxy, look for these important things:
Clarity and Transparency
You want the epoxy to be clear. This lets the wood’s natural beauty shine through. Some epoxies can turn yellow over time. Look for epoxies that are UV resistant. This stops them from yellowing.
Low Viscosity
Viscosity is how thick the epoxy is. A lower viscosity epoxy flows easily. It gets into all the small cracks and holes in the wood. This makes filling gaps much simpler. Thicker epoxies can trap air bubbles.
Self-Leveling Properties
Good epoxy spreads out evenly on its own. This means you don’t have to work hard to make it flat. Self-leveling epoxy creates a smooth finish with less effort.
Bubble Release
Air bubbles can ruin the look of your table. The best epoxies release trapped air bubbles easily. Some epoxies have special additives that help bubbles rise to the surface. You can then pop them.
Cure Time
Epoxy needs time to harden. Some cure quickly, while others take longer. Consider how much time you have for your project. Faster cure times mean you can finish sooner. Longer cure times often result in a harder, more durable finish.
Durability and Hardness
Once cured, epoxy should be strong and tough. It needs to resist scratches and dents. A harder epoxy will last longer.
Important Materials
Epoxy resin is usually made from two parts. You mix them together.
- Resin: This is the main liquid part.
- Hardener: This liquid makes the resin cure and harden.
Always follow the mixing instructions carefully. The ratio of resin to hardener is very important.
Factors That Improve or Reduce Quality
Many things affect the quality of your epoxy.
Temperature
The temperature of your workspace matters. It should be between 70-80°F (21-27°C). If it’s too cold, the epoxy might not cure properly. If it’s too hot, it can cure too fast and cause problems.
Mixing
Mixing the resin and hardener correctly is crucial. If you don’t mix them well, the epoxy won’t harden everywhere. Use clean containers and stir for the time recommended. Scrape the sides and bottom of the container.
Pouring Technique
Pouring the epoxy slowly and evenly helps. This reduces the chance of trapping air. Pouring in layers can also help with large pours.
Contamination
Dust, dirt, or moisture can ruin the finish. Keep your workspace clean. Make sure your wood is dry before you start.
User Experience and Use Cases
People use epoxy for many reasons on live edge tables.
Filling Knots and Cracks
Epoxy fills gaps in the wood. It makes the surface smooth and safe to touch. This also adds a cool visual element.
Creating a Clear Coat
You can pour a thin layer of epoxy over the entire table. This protects the wood. It gives the table a shiny, glass-like finish.
Adding Color
You can add pigments or dyes to the epoxy. This creates colorful fills or unique designs.
Stabilizing the Wood
Epoxy can help hold together pieces of wood. It prevents them from splitting further.
Beginner-Friendly Projects
Some epoxies are easier for beginners. They have longer working times and good bubble release. These are great for first-time epoxy users.
Advanced Projects
More experienced users might choose epoxies that cure faster or allow for more complex color effects.
Frequently Asked Questions (FAQ)
Q: What is the best type of epoxy for live edge tables?
A: Look for a clear, UV-resistant, low-viscosity, self-leveling epoxy with good bubble release. Many brands offer “tabletop” or “casting” epoxies that work well.
Q: Can I use any epoxy for my live edge table?
A: It’s best to use epoxy specifically designed for woodworking or casting. Regular craft epoxies might not be durable enough or may yellow over time.
Q: How do I avoid bubbles in my epoxy pour?
A: Work in a warm environment, mix slowly and thoroughly, pour slowly, and use a heat gun or torch to pop surface bubbles.
Q: What is the ideal temperature for working with epoxy?
A: The ideal temperature is usually between 70-80°F (21-27°C). Always check the manufacturer’s instructions.
Q: How thick can I pour epoxy at once?
A: This depends on the epoxy. Some can be poured in thick layers, while others need to be poured in multiple thin layers to prevent overheating and cracking.
Q: How long does epoxy take to cure?
A: Cure times vary greatly. Some epoxies are touch-dry in 24 hours, but full hardness can take several days to a week.
Q: Can I add color to my epoxy?
A: Yes, you can add epoxy pigments or dyes. Use products made for epoxy to ensure they mix properly and don’t affect the cure.
Q: What if I make a mistake with my epoxy pour?
A: If the epoxy hasn’t fully cured, you might be able to sand it down and re-pour. For fully cured mistakes, sanding and refinishing is usually the best option.
Q: Do I need to seal the wood before pouring epoxy?
A: Yes, it’s highly recommended to seal porous wood with a thin coat of epoxy or a sealant. This prevents air bubbles from escaping the wood and entering your pour.
Q: How do I clean up epoxy spills?
A: Clean up wet epoxy spills immediately with isopropyl alcohol. Once cured, epoxy is very difficult to remove and will likely require sanding.
In conclusion, every product has unique features and benefits. We hope this review helps you decide if it meets your needs. An informed choice ensures the best experience.
If you have any questions or feedback, please share them in the comments. Your input helps everyone. Thank you for reading.
Hi, I’m Robert Contreras, a passionate archery instructor based in the USA. With years of experience under my belt, I’ve dedicated my life to mastering the art of archery and sharing its intricacies with enthusiasts of all levels. Through my website, 10Bows.com, I invite you to explore a treasure trove of tips, techniques, and personal insights that reflect my journey in the world of archery. Whether you’re picking up a bow for the first time or refining your skills, I’m here to help guide you toward precision, focus, and a deeper appreciation for this timeless sport.